Homes
Already have an Account? Sign In
Businesses
Commercial services are estimated onsite. Please click below to schedule your estimate.
Simple & Quick Valentine’s Day Crafts for Kids
Who wants to go out in all this slush and snow? February is the perfect time to warm up indoors with your little ones and get creative. Break out the glue sticks, construction paper, and yarn for some Simple & Quick Valentine's Day crafts for kids, just in time for Valentine’s Day!
 Materials needed:
 Materials needed:
 Materials needed:
 Materials needed:
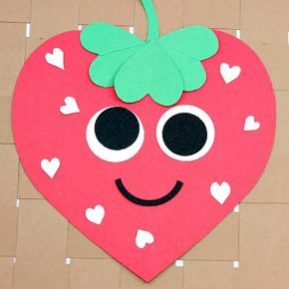
I Love You Berry Much! Strawberry Valentine
 Materials needed:
- Scissors
- Green, red, white, and black construction paper
- Glue stick
- Marker
- Cut out 1 big red heart, 3 small green hearts, and 5-7 tiny white hearts. This will be the body and stem of your strawberry!
- Cut out a thin green strip of paper (the stem!) and a curved black strip of paper (the mouth!)
- Cut out 2 quarter sized white circles and 2 slightly smaller white circles.
- Glue the black circles onto the white circles - now you have eyes! Glue these onto the red heart.
- Glue black curved strip underneath eyes - the face is finished!
- On the top of the red heart glue down the three green hearts to make the leaves, glue the green strip to the backside of the red heart for a stem.
- Glue the tiny white hearts down all over (these are the tiny seeds on the strawberry!)
- Let glue dry. You can write a fun message on the back and turn it into a Valentine or just hang it up as a cute decoration!
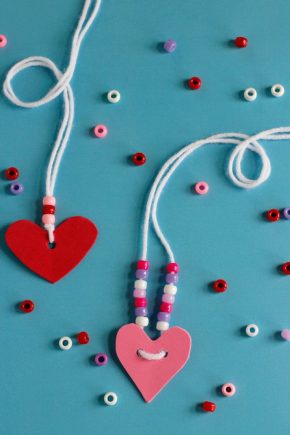
Beaded Heart Necklace
 Materials needed:
- Red and pink craft foam
- Plastic pony beads
- Yarn
- Hole punch
- Scissors
- Cut a square in the craft foam. It can be small or a little larger, depending on how big you want your heart necklace to be!
- Fold that square in half and cut out a heart shape.
- Punch one or 2 holes into your heart, make sure to leave some space between the hole and the top of the heart!
- Cut a piece of yarn about 2-3 feet long and thread it through the hole.
- Start stringing beads on to the yarn. You can use all the same color beads or have fun and create a pattern! Once you have added as many beads as you want, tie the ends together.
- Ta Da!!! A heart necklace perfect for Valentine’s Day!
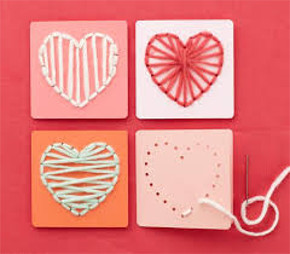
Woven Valentines
 Materials needed:
- Colorful cardstock or construction paper
- Scissors
- Thumbtack
- Yarn
- Large blunt needle
- Use the cardstock to create your cards.
- Trace a heart shape onto the front of the card.
- Using the thumb tack, follow the heart outline and pierce a hole every ½ cm.
- String the yarn through the blunt needle; tie a knot on the end so it doesn’t pull all the way through!
- You can just sew along the heart shape but don’t be afraid to get creative and experiment! You can create stripes or a zig zag pattern!
- Write a sweet message on the inside and give it to someone you love!
Heart Garland
 Materials needed:
- Pink and red construction paper*
- Scissors
- Stapler
- Cut your colorful paper into strips 1 in wide and 9 in long. Construction paper is 9 in wide so if you are using that just cut it into 1 in strips!
- Fold 2 paper strips in half.
- Take one of the folded strips and staple it on the folded end about ½ cm from the edge of the paper.
- Un-fold the paper strip and shape it into a heart, pinch the bottom to hold together - don’t staple yet!
- Grab your other folded strip of paper and open it, place the crease against the bottom of the first heart you have created, and fold it over your already made heart. Staple the bottom of the heart about ½ cm from the edge of the paper. You have created your first heart and started the second one!
- Repeat step 4 and 5 until you are happy with the length of your heart garland, then staple the ends of your last heart together.
- Show your house some love and hang your festive garland above a door, on a bookshelf, or on a cabinet!